Play偺僌儘乕僶儖側愝掕仌spec2偱BDD側僥僗僩丗Scala亄Play 2.0偱Web傾僾儕奐敪擖栧乮8乯乮2/4 儁乕僕乯
儐乕僓乕搊榐傾僾儕偺廋惓
丂僥僗僩傪嶌惉偡傞慜偵丄儐乕僓乕搊榐婡擻傪廋惓偟傑偡丅儌僨儖丒僐儞僩儘乕儔丒僥儞僾儗乕僩傪廋惓偟丄僒乕價僗僋儔僗傪怴偨偵捛壛偟傑偡丅
儌僨儖廋惓
丂User僥乕僽儖偵崌傢偣偰丄儌僨儖僆僽僕僃僋僩傪師偺傛偆偵廋惓偟傑偡丅
//models/models.scala
case class User(id:Option[Long],name:String,
  email: String,password:String,createDate:Option[Timestamp])
丂id偲createDate偼null偺壜擻惈偑偁傞偺偱丄Option宆偱愰尵偟傑偡丅
僒乕價僗嶌惉
丂師偵丄app/services僨傿儗僋僩儕傪嶌惉偟丄UserService.scala僼傽僀儖傪嶌惉偟傑偡丅偦偙偵幚嵺僨乕僞儀乕僗偵傾僋僙僗偡傞丄UserService僆僽僕僃僋僩傪嶌惉偟傑偡丅
package services
import models.User
import play.api.db._
import play.api.Play.current
import anorm._
import anorm.SqlParser._
import java.sql.Timestamp
object UserService {
/**丂User僥乕僽儖偺偡傋偰偺僇儔儉傪庢摼丂*/
private val * = {
int("id") ~ str("name") ~ str("email") ~ str("password") ~ date("createDate") map {
case id ~ name ~ email ~ password ~ createDate =>
User(Some(id), name, email, password, Some(new Timestamp(createDate.getTime())))
}
}
/**丂儐乕僓乕偺PK専嶕丂*/
def findByPk(id:Long): Option[User] = {
DB.withConnection { implicit c =>
SQL("select * from User where id = {id}")
.on('id -> id)
.as(*.singleOpt)
}
}
/** 儐乕僓乕搊榐.丂*/
def entry(name: String, email: String, password: String):Option[Long] = {
DB.withConnection { implicit c =>
SQL(
""" insert into User(name,email,password) values({name},{email},{password}) """)
.on('name -> name, 'email -> email, 'password -> password).executeInsert()
}
}
}
丂UserService僆僽僕僃僋僩偱偼2偮偺儊僜僢僪傪掕媊偟傑偡丅findByPk娭悢偼id(僾儔僀儅儕僉乕)傪庴偗庢偭偰懳墳偡傞User僆僽僕僃僋僩傪曉偟傑偡丅entry儊僜僢僪偱偼僼僅乕儉偐傜擖椡偝傟偨抣傪庴偗庢傝丄怴偨側儐乕僓乕傪搊榐偟傑偡丅
丂傑偨丄entry偑曉偡抣偼搊榐偝傟偨儐乕僓乕偺id偺抣偲側偭偰偄傑偡丅
丂private曄悢偲偟偰乽*乿偑掕媊偝傟偰偄傑偡偑丄偙傟偼findByPk偺as娭悢撪偱巊傢傟偰偄傑偡丅User僥乕僽儖偺select寢壥傪僷乕僗偟丄User僆僽僕僃僋僩傪峔抸偟偰曉偡偨傔偺僷乕僗梡娭悢偱偡丅偙偆傗偭偰掕媊偟偰偍偗偽丄懠偺娭悢偱傕巊偄夞偣傞偺偱曋棙偱偡偹丅
僐儞僩儘乕儔廋惓
丂偦偟偰丄UserController偺廋惓傪峴偄傑偡丅僼僅乕儉傪Tuple3偱掕媊偟丄entrySubmit偱偼UserService傪屇傃弌偟偰僨乕僞儀乕僗偵搊榐偟偰偄傑偡丅
丂搊榐偑偆傑偔偄偭偨傜丄findByPk傪屇傃弌偟偰儐乕僓乕忣曬傪庢摼偟丄寢壥夋柺傊搉偟偰偄傑偡丅
package controllers
import play.api._
import play.api.mvc._
import play.api.data._
import play.api.data.Forms._
import models._
import services.UserService
object UserController extends Controller {
  val userForm = Form(
    tuple(
      "name" -> nonEmptyText,
      "email" -> email,
      "password" -> nonEmptyText))
  def entryInit = Action { implicit request =>
    val filledForm = userForm.fill("name", "email", "password")
    Ok(views.html.user.entry(flash.get("result").getOrElse(""), filledForm))
  }
  def entrySubmit = Action { implicit request =>
    userForm.bindFromRequest.fold(
      errors => {
        BadRequest(views.html.user.entry("error", errors))
      },
      success => {
        val (name, email, password) = success
        UserService.entry(name,email,password) match {
          case Some(id) => {
            UserService.findByPk(id) match {
              case Some(u) => Ok(views.html.user.entrySubmit(u))
              case None => Redirect("/user/entry").flashing("result" -> "user not found")
            }
          }
          case None => Redirect("/user/entry").flashing("result" -> "entry failure")
        }
      })
  }
}
Scala僥儞僾儗乕僩廋惓
丂儌僨儖傗僐儞僩儘乕儔傪廋惓偟偨偺偱丄偦傟偵晅悘偟偰Scala僥儞僾儗乕僩傕廋惓偟側偗傟偽偄偗傑偣傫丅views/user/entry.scala.html偱偼丄僼僅乕儉偺宆傗堷悢丄擖椡崁栚側偳傪師偺傛偆偵廋惓偟傑偟傚偆丅
@(result:String,userForm: Form[(String,String,String)])
@import helper._
@main("entry user") {
  <h1>Entry user</h1>
  @helper.form(action = routes.UserController.entrySubmit) {
      <fieldset>
        <legend>input user info.</legend>
         @helper.inputText(userForm("name"))
         @helper.inputText(userForm("email"))
         @helper.inputText(userForm("password"))
    </fieldset>
    <input id="entry" type="submit" value="entry">
  }
}
丂嵟屻偵丄搊榐寢壥夋柺(views/user/entrySubmit.scala.html)傪廋惓偟傑偡丅偙偙偱偼丄寢壥偲偟偰搊榐偟偨儐乕僓乕僆僽僕僃僋僩傪庴偗庢傝丄偦偺僾儘僷僥傿傪昞帵偟傑偡丅
@(user:User)
@main("entry user submit") {
    <h1>Entry User</h1>
    id:@user.id.get</br>
    name:@user.name</br>
    email:@user.email</br>
    creat date:@user.createDate.get</br>
}
丂偙偙傑偱婰弎偟偨傜摦嶌妋擣傪偟偰傒傑偟傚偆丅play僐儞僜乕儖偐傜傾僾儕傪婲摦偟丄/user/entry傊傾僋僙僗偟偰傒偰偔偩偝偄丅壓婰偺傛偆側夋柺偑昞帵偝傟傑偡丅
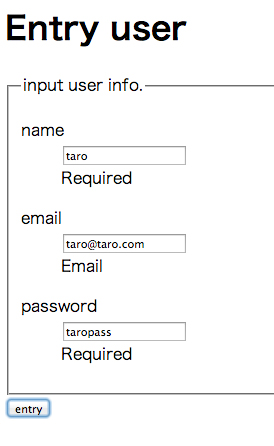 儐乕僓乕搊榐夋柺
丂抣傪擖椡偟丄乽entry乿儃僞儞傪僋儕僢僋偟偰傒傑偟傚偆丅惓偟偄抣偱偁傟偽丄MySQL偵擖椡偟偨僨乕僞偑搊榐偝傟丄寢壥夋柺偵昞帵偝傟傑偡丅
Copyright © ITmedia, Inc. All Rights Reserved.


![]() ITmedia偼傾僀僥傿儊僨傿傾姅幃夛幮偺搊榐彜昗偱偡丅
ITmedia偼傾僀僥傿儊僨傿傾姅幃夛幮偺搊榐彜昗偱偡丅